
Meals ready-to-eat (MRE) have long been the go-to food source for military personnel, emergency responders, and outdoor enthusiasts. These compact, shelf-stable meals provide all the nutrients needed to maintain energy levels in high-stress situations or during long trips away from civilization. But did you know that creating your own DIY mre is not only possible but also easy and cost-effective? In this blog post, we will guide you through the process of making your own meals ready-to-eat, ensuring that you always have a nutritious and convenient meal option on hand.
The Anatomy of an MRE: What Makes a Meal Shelf-Stable?
Before diving into the world of DIY MREs, it’s important to understand what makes these meals so unique. At their core, MREs are designed to be:
Long-lasting – With a shelf life ranging from three to five years, depending on storage conditions.
Nutrient-dense – Providing enough calories and essential nutrients to sustain an individual during high-energy activities.
Compact – Taking up minimal space in a backpack or emergency kit.
Easy to prepare – Requiring little more than boiling water or simply consuming straight out of the packaging.
To achieve these qualities, commercial MREs often rely on specialized packaging materials and techniques such as vacuum sealing and retort pouches – which may not be readily available for home use. However, with some creativity and careful planning, it’s still possible to create your own DIY MREs that meet all these criteria.
Step 1: Choose Your Ingredients Wisely
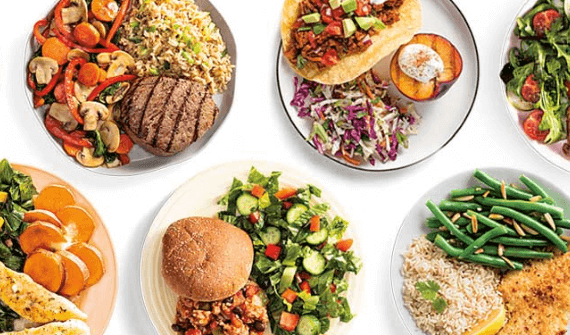
When selecting ingredients for your homemade MREs, focus on shelf-stable items that require minimal preparation. Some popular options include:
Dehydrated or freeze-dried fruits, vegetables, and meats – These items have had most of their moisture removed, making them less prone to spoilage and lightweight for easy transport.
Instant grains and pasta – Quick-cooking options like instant rice, couscous, or ramen noodles are great bases for an MRE.
Canned or pouched meats – Tuna, chicken, or even spam can be a protein-packed addition to your meal.
Snacks and sides – Consider adding granola bars, trail mix, jerky, or crackers to round out your MRE.
Remember that variety is key when creating DIY MREs – having several different meal options will prevent boredom and ensure you’re getting all the nutrients you need.
Step 2: Package Your Meals for Longevity
Proper packaging is essential in extending the shelf life of your DIY MREs. Consider investing in a vacuum sealer – these devices remove air from bags before sealing them shut. Vacuum sealing not only reduces the risk of spoilage but also compacts your meals for easier storage.
If a vacuum sealer isn’t an option, heavy-duty zip-top bags can also work well. Be sure to press out as much air as possible before sealing the bags to reduce oxidation and spoilage.
For added protection against moisture and pests, consider placing vacuum-sealed or zip-top bags inside larger mylar bags with oxygen absorbers. Mylar provides an additional barrier against light and air infiltration.
Step 3: Plan for Easy Meal Preparation
One of the hallmarks of MREs is their ease of preparation – often requiring little more than hot water to rehydrate ingredients. As you create your DIY MREs, keep this in mind by choosing recipes that can be cooked with minimal equipment and effort.
Some tips for easy meal prep include:
Pre-measure ingredients – Portion out exact amounts needed for each recipe into individual bags. This eliminates the need for measuring cups or spoons in the field.
Include cooking instructions – Write or print out simple step-by-step instructions for preparing each meal, then tuck them into the bags with your ingredients.
Plan for hot water access – If you’ll be relying on boiling water to rehydrate and cook your MREs, ensure you have a portable stove or heating device available.
Bonus Tip: Create a DIY Flameless Ration Heater
Commercial MREs often include a flameless ration heater (FRH) – a simple chemical reaction that produces heat when activated by water. You can create your own DIY version using items found at most hardware stores:
Purchase calcium chloride pellets – these are commonly used as ice melt during winter months.
Fill a small zip-top bag with about 1/4 cup of pellets.
When ready to heat your meal, add approximately 2 tablespoons of water to the bag and quickly seal it shut.
The chemical reaction between the calcium chloride and water will produce heat – place this bag next to your vacuum-sealed meal inside an insulated container (like a small cooler) to warm up your food.
See also: Sweet Escapes in the Windy City | Discovering the Best Dessert in Chicago
Conclusion: Enjoy Your Customized, Convenient DIY MREs
Creating your own meals ready-to-eat is not only rewarding but also allows for customization based on individual tastes and dietary needs. By choosing shelf-stable ingredients, packaging them properly, and planning for easy meal preparation, you’ll have a stockpile of nutritious and convenient meals ready whenever you need them.
Now that you’re equipped with the knowledge needed to create your own DIY MREs, it’s time to start experimenting with recipes and stocking up on supplies! Don’t forget to share your creations with friends and family – they’ll be impressed by both your resourcefulness and culinary skills!
However, the possibilities for DIY MREs don’t end there. You can also get creative with your packaging and labeling to add a personal touch to your meals. For example, you could use custom stickers or labels on your bags or containers, making it easier to identify specific meals or adding a fun design element.
Additionally, consider incorporating longer-lasting items like dehydrated spices, herbs, and sauces into your recipes for added flavor and variety in your DIY MREs. These small additions can make a big difference in the overall taste of your meals.