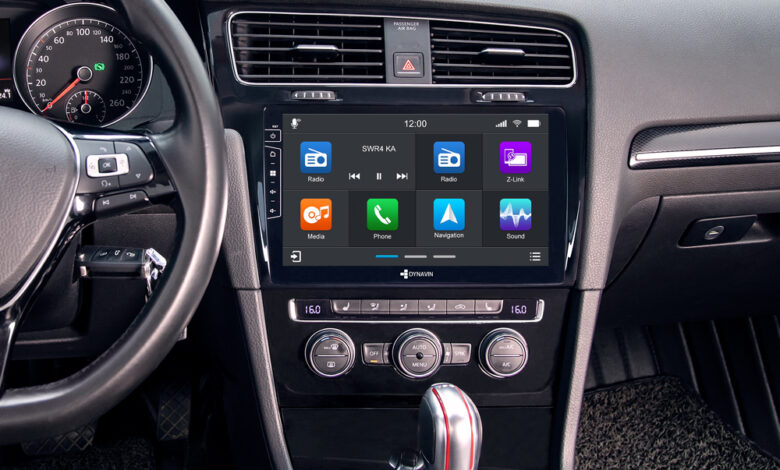
Upgrading the Factory Radio in Your VW Golf: Apple CarPlay and Android Auto Integration

The factory-installed radio in many VW Golf models often offers only basic functions that no longer meet modern standards. With technologies like Apple CarPlay and Android Auto, you can transform your car into a multimedia system, greatly improving comfort and safety. Whether you want to stream music, make calls, or use Google Maps for navigation, upgrading to a modern aftermarket head unit offers numerous benefits. In this post, you’ll learn how to replace your VW Golf factory radio with a more modern unit and what components are required for the installation.
Why Apple CarPlay and Android Auto?
With Apple CarPlay and Android Auto, you can seamlessly integrate your smartphone into your vehicle. This allows you to use apps like Spotify, Google Maps, WhatsApp, and many others directly through your head unit. Voice control via Siri or Google Assistant enables you to make calls, send and receive messages, or select music without taking your hands off the wheel.
The integration of these functions makes driving safer and more convenient, as the driver can fully concentrate on the road. Upgrading to a modern Double-DIN head unit that supports these technologies brings your VW Golf up to the level of the latest vehicles.
What Components Are Needed for the Installation?
To replace the factory radio with a head unit that supports Apple CarPlay or Android Auto, you will need specific installation components to ensure that the new device fits perfectly in your vehicle and retains all functions:
- Fascia Plate: A vehicle-specific fascia plate ensures that the new head unit fits securely into your VW Golf’s radio slot, providing a clean, professional look. Depending on the model, you will need either a 1-DIN or Double-DIN fascia plate.
- Harness Adapter: This adapter connects the new head unit to the factory wiring harness, ensuring that essential functions such as speakers, power supply, and steering wheel controls remain operational.
- Antenna Adapter: The antenna adapter ensures that the new head unit continues to receive FM, DAB+, and other radio signals. This is particularly important in vehicles equipped with proprietary antenna connectors from the factory.
Visit Autoradio Adapter for the appropriate adapters and Autoradio Einbauset for installation kits to equip your vehicle with a modern radio system.
Step-by-Step Installation Guide
Step 1: Removing the Factory Radio
First, you need to remove the old factory radio from the vehicle. For this, you will need special radio removal tools, which are used to unlock the radio from its slot. Insert these tools into the slots on the sides of the radio to release the locks. Once the radio is unlocked, you can carefully pull it out. Next, disconnect the wiring harness and antenna connection from the radio.
Be sure to disconnect the connections carefully without damaging the cables. Use a plastic lever, if necessary, to gently work on the dashboard.
Step 2: Preparing the Installation Kit
Once the factory radio has been removed, install the new fascia plate. This fits perfectly into the existing radio slot and provides the foundation for the new head unit. Ensure that the fascia plate is securely in place to guarantee stability during installation. Check that all the mounting elements of the fascia engage properly into the slot to ensure a clean and professional look.
Step 3: Connecting the Harness Adapter
The harness adapter is a crucial part of the installation. It connects the factory wiring harness to the new head unit, ensuring that power, speakers, and steering wheel control functions continue to work. Connect the adapter to the corresponding ports on the new head unit and make sure all connections are securely fastened.
Step 4: Installing the Antenna Adapter
To ensure uninterrupted radio reception, you need to connect the antenna adapter. This adapter ensures that the new head unit is compatible with the factory-installed antenna system. Depending on your model, you may need a DIN to ISO antenna adapter. Connect the adapter securely and make sure it is firmly in place.
Step 5: Installing the New Head Unit
Insert the new Double-DIN head unit or 1-DIN head unit into the prepared slot and secure it using the supplied screws. Make sure the head unit is securely fastened and fits snugly in the fascia plate. Gently slide it into place, ensuring no cables are pinched or damaged.
Step 6: Testing the System
Before fully reassembling the dashboard, test all functions of the new head unit. Check radio reception, Bluetooth connection, and the functionality of Apple CarPlay or Android Auto. Also, ensure the steering wheel controls work properly if you’ve installed the corresponding adapter.
Step 7: Reassembling the Dashboard
Once everything is tested and functioning properly, reattach the fascia plate and trim pieces on the dashboard. Make sure all clips and screws are in place, providing a secure fit and a clean look.
Conclusion: Simple Modernization for Your VW Golf
Upgrading to a modern Apple CarPlay– and Android Auto-enabled head unit not only provides extra convenience but also greatly enhances safety and the overall driving experience. With the right installation kit and appropriate adapters, even DIY enthusiasts can perform this upgrade without any issues.
With the right components you can bring your VW Golf up to the latest technology standards and enjoy an improved driving experience.
