
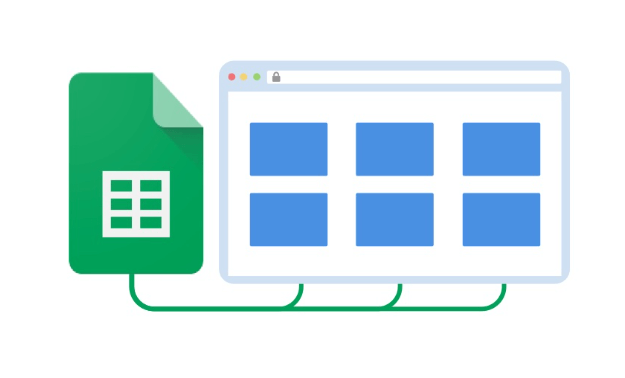
Google Sheets is a valuable resource for managing data, following information, and collaborating with others consistently. However, envision a situation where you truly need to show that data on your site. Embedding Google Sheets into your site permits you to exhibit live, unique information without expecting to physically refresh it each time something changes. This guide will walk you through how to effortlessly install google sheets into website, making your information more intelligent and open for your guests.
Why Embed Google Sheets into a Site?
Embedding Google Sheets into your site accompanies a few benefits:
- Continuous Updates: Any progressions you make in the Google Sheet are naturally thought about your site.
- Coordinated effort: In the event that numerous individuals approach the Google Sheet, updates can be made cooperatively.
- Simple Sharing: Sharing nitty gritty information on a site page becomes basic, and guests don’t have to download or demand admittance to a bookkeeping sheet.
- Customization: You can Embed explicit pieces of your Google Sheet (like a table or diagram), or install the whole sheet, contingent upon your necessities.
Presently, how about we get into the moves toward install Google Sheets into your site.
See also: 11 Website Speed Optimization Tips for Beginners
Stage 1: Set up Your Google Sheet for Embedding
Prior to Embeding your Google Sheet, you really want to prepare sure it’s for public survey. Follow these moves toward guarantee your information is open:
- Open Your Google Sheet: Explore to the Google Sheet that you need to implant.
- Share the Sheet Openly:
- Click on the “share” button at the upper right corner.
- In the spring up window, under “Get Connection,” click “Change to anybody with the connection.”
- Set the consent to “Watcher” so clients can see the substance however not alter it.
This will make your Google Sheet perceptible by any individual who visits your site however guarantees they can’t roll out any improvements to the information.
Stage 2: Create the embed Code
Google Sheets gives an inherent component to produce an Embed code that you can put on your site. This is the way to get the code:
- Click on File Menu: When your sheet is open, go to the “Document” menu at the upper left of the screen.
- Publish to the Internet:
- In the dropdown menu, select “Distribute to the web.”
- A spring up window will show up. You can decide to distribute the whole sheet or simply a particular piece of it.
- Once you’ve made your choice, click “Distribute.”
- Google will furnish you with an extraordinary Embed code. This is the code you will use to install the sheet on your site.
- Copy the Install Code: Subsequent to distributing the report, a connection will show up. To install the sheet, click the “Implant” choice, and duplicate the code gave.
Stage 3: Implant Google Sheets in Your Site
Since you have the install code, now is the right time to put it on your site. The interaction might fluctuate marginally relying upon what stage or web designer you’re utilizing, yet the general advances are something similar.
For HTML Sites:
- Open Your HTML Manager: Go to the part of your site where you need the Google Sheet to show up.
- Paste the Implant Code: Supplement the code that you duplicated from Google Sheets into the suitable spot in your HTML.
- Save and Review: When the code is glued, save the progressions and see your site to guarantee the Google Sheet is showing appropriately.
For WordPress:
- Switch to Content manager: When altering a page or post in WordPress, change from the visual supervisor to the content tool.
- Paste the Install Code: Glue the Google Sheets implant code where you believe it should show up.
- Update or Distribute the Page: Whenever you’ve added the code, update or distribute your page. Your Google Sheet ought to now be implanted and noticeable to your guests.
For Web designers like SpreadSimple:
On the off chance that you’re utilizing a web designer like SpreadSimple, installing Google Sheets is comparably simple:
1. Use an Implant Block: SpreadSimple and comparable stages offer “HTML” or “Install” blocks where you can glue the Google Sheets code.
2. Place the Code: Simplified the block where you maintain that the sheet should show up, glue the code, and hit save.
Stage 4: Modify the Implanted Google Sheet
When your Google Sheet is installed, you might need to modify its appearance or usefulness to all the more likely suit your web composition’s or client experience. The following are a couple of ways of tweaking it:
Change the Size: In the implant code, you’ll see a section that says width=”600″ and height=”400″. You can change these qualities to resize the implanted sheet to more readily accommodated your page.
Connection to Explicit Tabs: Assuming your Google Sheet has different tabs and you just need to implant one explicit tab, you can adjust the Embed URL to interface straightforwardly to that tab. To do this, annex the accompanying code to your URL: &gid=[your-tab-ID]. You can find the tab ID in the URL while you’re seeing that tab in Google Sheets.
Make Intuitive Outlines: Assuming that your Google Sheet contains information perceptions like diagrams or charts, you can Embed simply the graphs instead of the whole sheet. This can be an extraordinary method for making your information all the more outwardly engaging and drawing in for guests.