
If you have a reliable fire starter, it could help you start a campfire or light your fireplace. If you don’t want to spend much on buying commercial fire starters, then there is no problem with making your own at home. Homemade fire starters can be included in emergency kits as well as given out as presents.
Let’s get started!
In this post, we’ll take you through the process of making easy do-it-yourself (DIY) fire starters using three common materials that are typically found around the house: wax, sawdust/wood shavings, and cardboard egg cartons.
Even though you’ve managed to get hold of quality fire starters, there are other possible ways to create your own. The whole process takes less than an hour and requires no special skills or equipment. Keep reading for the complete step-by-step method!
Step 1 – Gather the Necessary Supplies
To make homemade fire starters, you will need the following:
- Wax – Paraffin wax, beeswax, or soy wax will all work well. Look for wax in bulk or use old candle stubs.
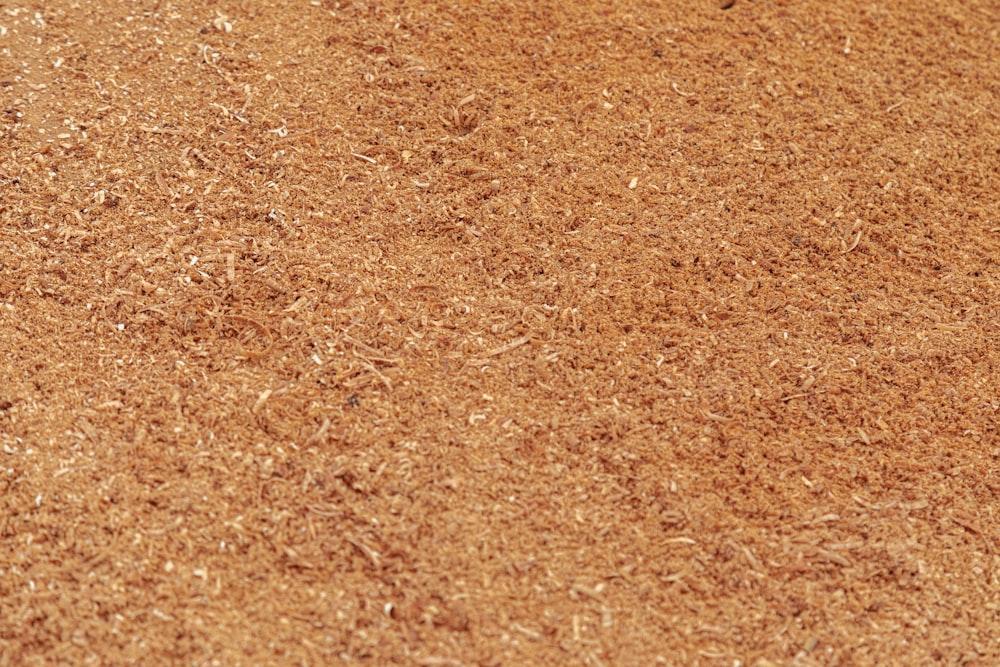
- Sawdust/Wood Shavings – You can use sawdust or small wood shavings from any untreated natural wood. Put the sawdust through a wire mesh strainer to filter out large pieces if needed.
- Cardboard Egg Cartons – Save your used cardboard egg cartons to reuse for this project. You will also need scissors to trim the cartons.
- Double Boiler – This allows you to melt the wax safely. Any metal bowl will work for the top part of the double boiler.
- Spoon – For stirring the wax and wood shavings mixture.
- Oven Mitts – To handle hot items safely.
That’s it! Those five essential items are all you need to assemble homemade fire starters in just a few easy steps.
Step 2 – Melt the Wax
Start by setting up your double boiler to melt the wax. Place a few inches of water in the bottom pot and rest your metal bowl on top. Make sure the bottom of the bowl does not touch the water. Turn the heat to medium-low and add wax chunks to the bowl.
Stir the wax occasionally as it melts. This should take 5 to 10 minutes. You want the wax completely melted and hot enough to soak into the sawdust but not so hot it would burn you. Remove the bowl from the heat once the wax is liquified.
While you wait for the wax to melt, prep your sawdust and egg cartons. Place shredded sawdust into a separate bowl or container. Then, cut the egg cartons into individual cups, trimming off any excess cardboard.
Step 3 – Combine and Pour into Molds
Now comes the fun part! Slowly pour the melted wax over the sawdust, stirring continuously with a spoon. You want the wax-coated sawdust mixture thick and moldable but not dripping with excess wax. Add more sawdust if needed.
Then, spoon the wax-soaked sawdust into the egg carton cups, pressing lightly to pack it in. Fill each cup almost to the top.
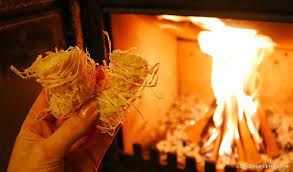
The homemade fire starters sit for 30 minutes to harden and cool thoroughly. Pop them out of the egg carton molds. At this point, they are ready to use!
If desired, you can add an extra layer of decoration or waterproofing. To coat the outside, try rolling the cooled fire starters in additional dry sawdust or wood shavings. Or brush the surface lightly with leftover wax.
Tips and Variations
- Use recycled or scrap paper instead of egg cartons for equally effective biodegradable molds. Form the wax sawdust blend into balls or small logs instead.
- Customize the shapes by packing the mixture into ice cube trays, muffin tins, or silicone molds instead of egg cups.
- For added firepower, mix a few drops of citronella oil, coconut oil, or petroleum jelly into the melted wax before pouring.
- To make fancier gift versions, add spices like cinnamon or cloves. Or stir in bits of old crayon shavings for color.
- Soy wax blends more smoothly than paraffin wax. But paraffin wax is generally cheaper. Use what you have on hand.
- Let children help spoon the sawdust mixture into the molds while the wax is still warm – with supervision, of course!
Storing Your Homemade Fire Starters
Allow the finished fire starters to dry 24-48 hours before use. Store in a cool, dry place away from direct sunlight and heat. Placing the fire starters in sealed bags or containers will help keep them clean and dry.
These homemade fire starters with proper storage should stay usable for up to a year. Monitor them and replace any that get too old or brittle. Making a new batch annually is a good idea.
Use Your Fire Starters
Light one homemade fire starter with a match or lighter when ready to build a fire. Before adding your kindling and logs, please place them in your fire pit, wood stove, or fireplace. The wax-coated sawdust will catch quickly and burn slowly to help ignite the larger firewood.
These DIY fire starters are inexpensive, simple to make, and work just as well as commercial versions. Keep plenty on hand for camping trips, power outages, and everyday fireplace use. Making your fire starters also allows you to control the ingredients.
Conclusion
In conclusion, you can quickly whip up homemade fire starters in three steps: melt wax, mix with sawdust, and pack into molds. Customize with your choice of molds, waxes, and add-ins. Then relish your quick campfires and cozy home fires all season long, knowing you made the fire starters yourself!